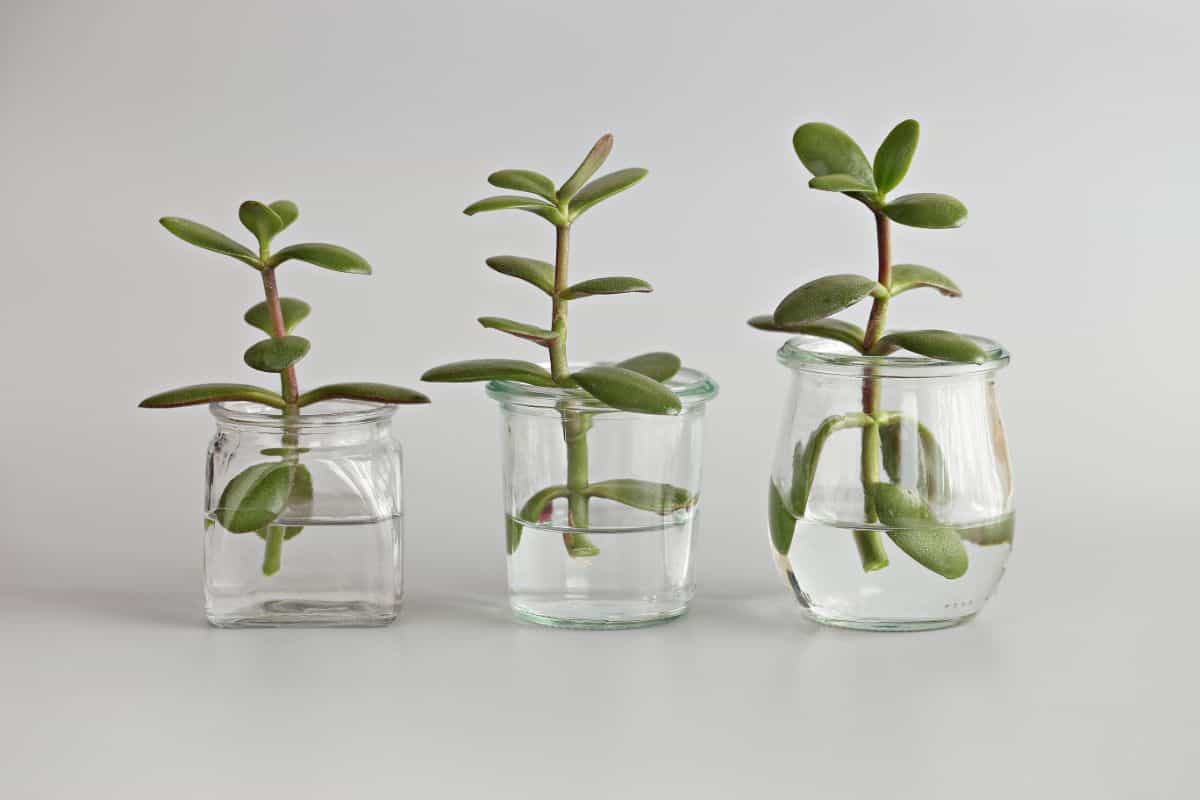
If you’ve tried propagating your succulents using the traditional method of planting your cuttings in soil, but haven’t gotten the results you were hoping for, you might want to consider trying to propagate your succulents in water.
Some succulent gardeners swear by water propagation, while others are indifferent. Many people say it depends on the species of succulent you’re trying to propagate. If you’re looking for a new propagation method to add to your bag of gardening tricks, why not try it out for yourself?
Jump to:
What is Water Propagation for Succulents?
If you’re unfamiliar with the idea of water propagation, the concept is quite simple. Instead of rooting your succulent cuttings in soil, as most gardeners do, you encourage them to root in pure water.
Now, this propagation method appears to go against everything you already know about succulents. As succulent caretakers, we’re told not to overwater our succulents and to avoid standing water at all costs, so propagating your beloved plants in water may seem like a bad idea.
However, when done correctly, many gardeners have found success in exposing their succulents to copious amounts of water for long periods of time. Perhaps you’ve heard of water therapy for succulents.
Water therapy is a popular but somewhat controversial method of reviving dehydrated plants by placing them in water for an extended period of time. It can help thirsty succulents bounce back faster than traditional watering methods alone.
Like water therapy, water propagation is a bit controversial. On one side, you have the diehard fans of water propagation who have found success in rooting certain species of succulent that refused to root in other planting mediums. On the other side, you have the gardeners who stick to their belief that succulents should not be placed in standing water for any reason.
However, if you’re open-minded enough to give water propagation a try, you might just find your new favorite method of propagating your succulents!
Should You Use Stem or Leaf Cuttings?
Now that you’ve decided to try water propagation, you’ll need to decide whether you should use stem or leaf cuttings. There is no right answer to this question, however, as it depends on several factors.
You’ll need to decide whether the specific species of succulent you’re attempting to propagate will grow better from a leaf cutting or from a stem cutting. You’ll typically have a mature plant in less time when using stem cuttings, simply because the plant only needs to produce roots. With leaf cuttings, it can take more time for the plant to produce roots and additional leaves.
If your succulent has become etiolated, you might consider a stem cutting to return the plant to its natural shape. The same is true for plants that have suffered damage from sunburn or pest damage.
In the end, it’s up to you whether you use leaf or stem cuttings for your water propagation experiment. You might also consider trying both to see which has more success.
Supplies Needed
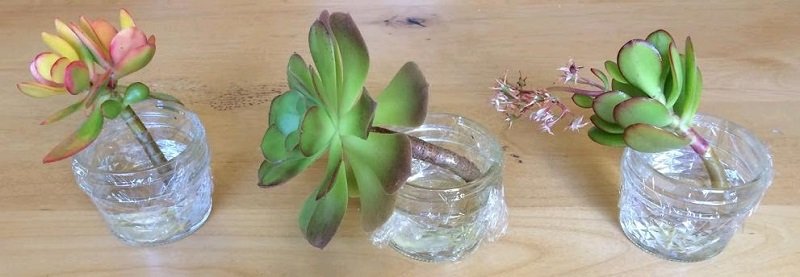
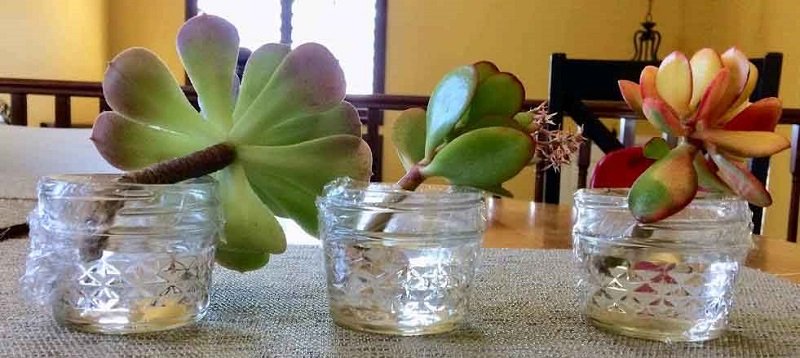
Before you get started, you’ll need to gather the supplies required for water propagation. Fortunately, you’ll only need a few things to begin, including succulent cuttings, clean water, a container, and plastic wrap.
Cuttings
If you haven’t already collected your cuttings, you’ll need to remove them from the mother plant with sterile, sharp scissors or shears. It’s generally not recommended to tear the leaves or stems from the plant as this results in a ragged edge that may be more prone to infection by fungus or bacteria.
Instead, you’ll want a clean cut at the base of the leaf or stem. Some gardeners recommend sterilizing your scissors or shears between plants to prevent the spread of bacteria and fungus from plant to plant.
After you’ve collected your cuttings and cleaned your shears for next time, you want to leave the cuttings alone for a few days. This is to allow the cuts to callous over, which will help prevent infection once you place the cuttings into water.
Water
Obviously, you’re going to need clean water for your water propagation project. Some gardeners recommend using distilled water or even rainwater, rather than normal tap water. This is due to the additives in tap water in many places across the country.
Tap water that is high in fluoride, or other chemicals and salts, will not be ideal for water propagation. You’ll also want to avoid water from local ponds or streams as they may contain bacteria or fungus that could infect your delicate cuttings.
Container
The type of container you use will be up to you. Unlike traditional propagation methods, you’ll want to avoid using a container with a drainage hole as you want the water to stick around.
Supporters of water propagation often use clear glass containers, such as mason jars, because it’s easier to see how your plant is progressing. You’ll be able to see the roots begin to develop and decide when to move the plants to a soil-based planting medium.
No products found.
However, you can also use plastic or ceramic containers if you don’t need to monitor your cuttings’ roots as closely. You’ll generally be able to see the roots when viewing the plants from above, so if you don’t have any clear containers, you don’t need to worry.
Plastic Wrap
Finally, you’ll need clear plastic wrap. You’ll use this to suspend your plants above the water in your container of choice. Without it, your cuttings may fall into the water and be fully submerged, which will likely result in rot rather than root growth.
The amount of plastic wrap you need will depend on the number of cuttings you’re propagating as well as the size of your container. You want to use enough wrap to support the weight of your cuttings, so it may need to wrap around the sides of the container for stability.
Water Propagation Step-by-Step
If you’re new to water propagation, you might be surprised by how easy it is. Water propagation is not any more complicated than traditional soil-based propagation, you will simply be using different tools to accomplish your goal.
Step 1 – Preparation
The first step is to prepare your cuttings and container. Hopefully, you’ve allowed your cuttings to callous for several days to a week prior to placing them in water. If you haven’t taken this step, it is highly recommended to wait a few days. Remember, healthier cuttings have a higher rate of rooting success!
Next, you need to pour an appropriate amount of water into your container of choice. You want to fill the container until it’s at a level where your cuttings can reach. For leaf cuttings, this may mean the container needs to be almost full. Depending on the length of your stem cuttings, it might need to be at a slightly lower level.
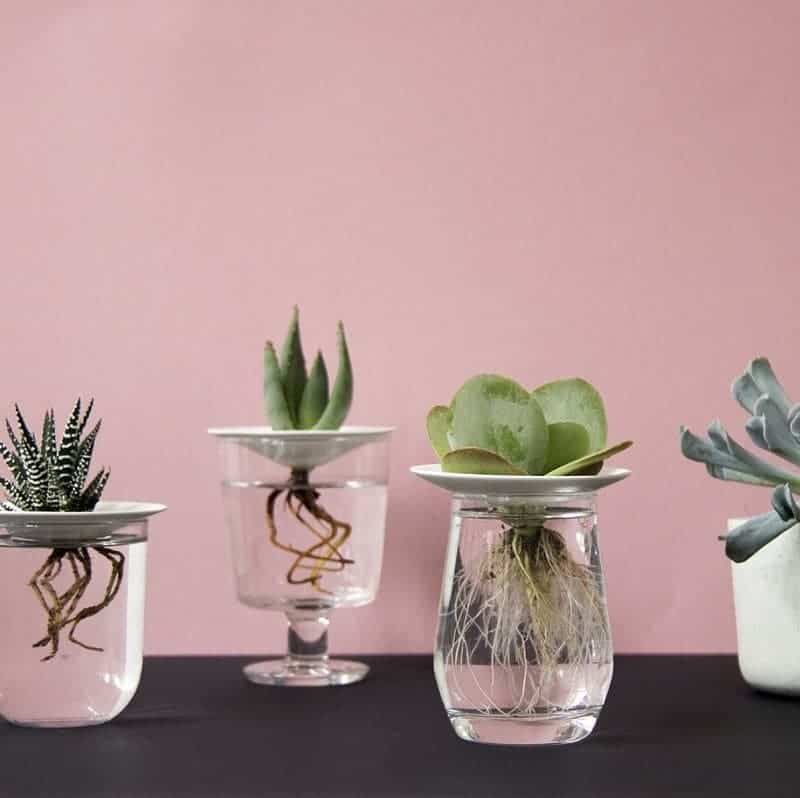
With water levels, there are two popular methods of water propagation. With the first method, the water will be just above the newly calloused part of the cutting. You want to avoid submerging the majority of the cutting in order to prevent it from rotting. Just the tip of the cutting should be below the water’s surface.
With the second method, you’ll actually suspend the cuttings just above the water’s surface. The idea behind this method is that as the roots develop, they’ll seek out the water. Neither method has been proven to be more successful than the other, so feel free to choose the method that appeals to you.
Once you’ve gotten the water levels right, you can cover the container with plastic wrap. Make sure the wrap is secured around the sides of the container, so it won’t slip inside with the weight of the cuttings.
Step 2 – Propagation
After your container has been prepared, you can insert your cuttings into the plastic. Be sure to insert them gently so that you do not damage either the plastic wrap or the cuttings. You’ll also want to space them out as needed to avoid tearing and weakening the plastic wrap.
Place your containers in a warm, bright area to encourage root growth. Make sure that you’re aware of the light requirements for the species of succulent you’re propagating so that you can give them the appropriate amount of light.
Some gardeners recommend avoiding direct sunlight at this stage to avoid burning your delicate cuttings. Instead, opt for bright, indirect light if possible.
Once you’ve found the perfect location for your cuttings, you can sit back, relax, and wait for the roots to develop. This is the easiest part of propagation. Remember, it can take up to several weeks for roots to begin developing.
Be sure to check in on your cuttings periodically to make sure the water doesn’t need to be replaced or replenished. You may need to add fresh water once in a while to encourage healthy root growth.
If the water in your containers appears clean, you may be able to just add more as the water evaporates. However, if the water appears dirty for any reason, it’s important to replace it with fresh, clean water.
Step 3 – Transplanting
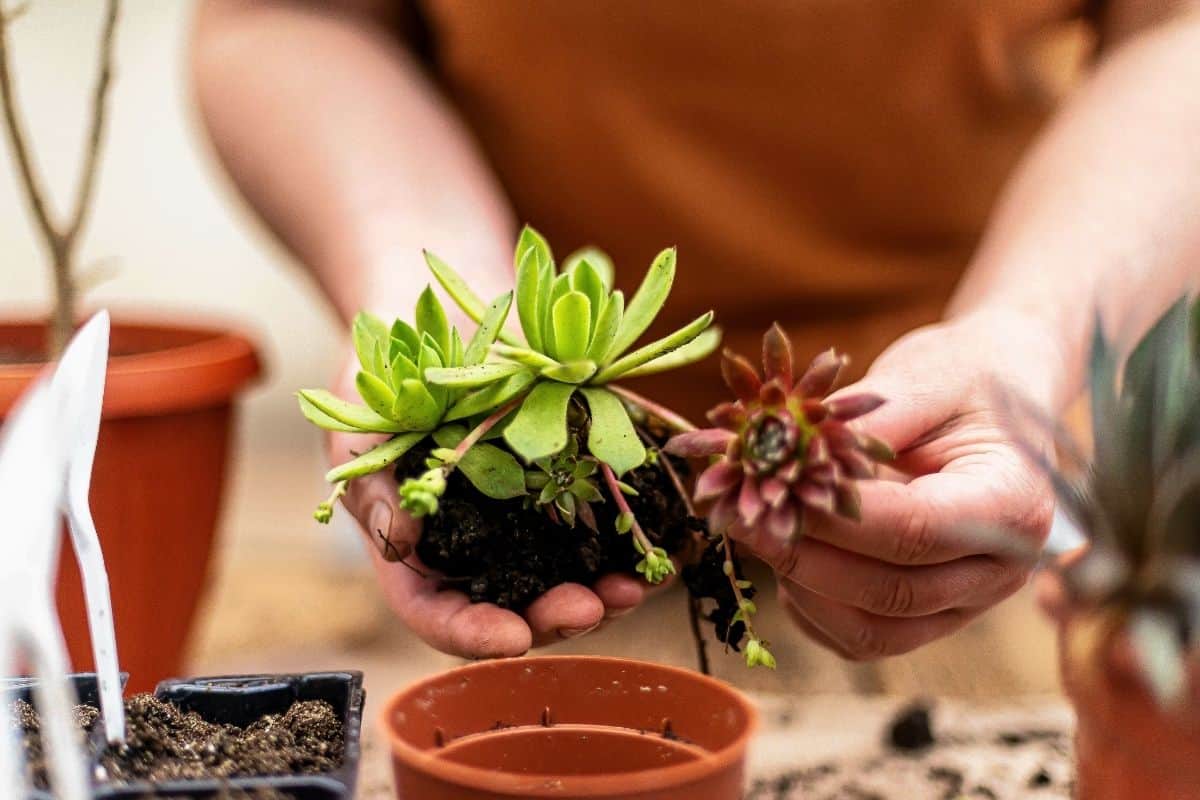
It’s important for your plants to develop a healthy root system prior to transplanting, so you may need to wait as long as six to eight weeks before moving your cuttings to new containers with soil.
The more roots your cuttings have when transplanted, the higher your chances of success are. You don’t need to wait until your succulent’s roots are an inch or more in length, but you want to make sure there are enough roots to ensure your cuttings’ survival once they’re moved to the soil.
Once you’ve decided your plant is ready to be moved out of the water, prepare an appropriately sized container. Remember, this container will need to provide the plant with proper drainage, so choose a container with drainage holes. While it is possible to grow succulents in containers without drainage holes, it’s not recommended.
Next, fill the container about ⅓ full with soil. Choose a soil that’s appropriate for succulents and cacti. This means avoiding soil with high clay content. Instead, choose a soil with large particles such as sand, bark, gravel, or perlite. Your local gardening center or nursery may even have a commercial soil mix specifically formulated for use with succulents and cacti.
If you’ve never repotted a succulent, the process is simple. Since the plant was propagated in water, you don’t need to clean the roots off before preparing the pot.
You can dry the roots off gently with a towel prior to planting if you’d like to avoid getting water all over your workstation. Be sure to handle the cuttings gently, as the roots may be very fragile at this stage.
Gently place the succulent into the center of the pot and fill in the areas around the roots. You may need to support the plant with one hand while you add soil with the other. When filled, the surface of the soil should be about 1 – 1 ½ inch below the top of the pot.
If you’re struggling to hold the cutting and fill the pot, you can also place a chopstick into the pot after adding the initial amount of soil. Then, you can tie the cutting to the chopstick at approximately the height it will be when you’re finished. Afterward, simply remove the chopstick and string.
Don’t compact the soil when you’re done! Airflow is essential in succulent root health and compacting the soil will reduce the amount of aeration available below the surface. The soil will compact enough on its own with regular watering, so you don’t need to tamp it down.
After your cuttings are safely planted in their new homes, you can begin to water them as you would normally water your other plants. If you need a little guidance on proper watering techniques, read our Ultimate Guide to Watering first.
Roots in Water vs. Soil
It’s important to note that the roots your succulent cuttings develop when grown in water will differ from those produced by cuttings grown in soil. “Water roots” tend to be more fragile than “soil roots” as they don’t have to work as hard to find moisture.
The roots of succulents grown in water are also more adapted to absorbing oxygen from their aquatic environment rather than a terrestrial one, so there will be a transitional period of root development once you move the plants into the soil.
As a result, the roots you see on cuttings grown in soil will be sturdier and more robust than the thin, frail roots of a cutting grown in water. This isn’t necessarily a bad thing, but it is something to be aware of so you can handle the cuttings appropriately.
Some gardeners have different methods of transitioning water roots into the soil in order to prevent any damage done by rough handling.
One method of transitioning is to dip the roots into a muddy slurry before planting the cuttings in soil. This is intended to provide the roots with a watery coating that will help transition the roots into the soil.
Another method is to temporarily plant the cuttings into a porous substrate such as perlite or gravel. The container is then partially filled with water and once the water has evaporated, the plants can be moved into the soil.
Depending on how much water is in the container, it typically takes a week or two for the water to fully evaporate. This will give your cuttings additional time to grow strong and sturdy roots prior to being transplanted.
This method is intended to give the cuttings a chance to transition from water to soil through the use of an intermediate step. Using a porous material without any organic matter will give your cuttings’ roots the chance to toughen up a bit before moving to actual soil.
These additional steps are not necessary, but they are something to consider if your succulents have produced particularly delicate water roots. They’re also a great option for water propagation newbies who may be hesitant about such a drastic transition in growing mediums.
Water Propagation vs. Soil Propagation
So, when should you propagate your cuttings in the water and when should you propagate them in soil? Unfortunately, there is no clear-cut answer here. As previously mentioned, proponents of water propagation swear by their success with this method, while others may find that their rate of success isn’t much different from using soil.
Even the most diehard supporters of water propagation will admit that not every species of succulent will grow better in water than in soil. The specific type of succulent you choose to propagate will have an impact on whether or not you succeed with water propagation. Additionally, some species can just be difficult to propagate no matter what you grow them in.
Whether you choose to propagate your succulents in water or soil comes down to a matter of choice. Water propagation may not be the right choice for every plant and every gardener, but if you’ve been struggling to propagate a certain type of succulent it doesn’t hurt to give water propagation a try.
You Might Also Like:


K Carter
Just totally NOT a good idea! I know "Water Therapy" and "Water Propagation" have been the latest fad in succulent care the past few years, so I decided to give them a try- My advise would be "Don't buy into the HYPE!!!" It does not work well, PERIOD! The conventional method of allowing cuttings to callus properly, planting in well draining soil (in pots with drainage holes- no tea cups and terrariums!), and watering deeply only when soil has dried out completely. NO SPRAYING water on your succulents. The problem people have with the conventional method arises out of TO MUCH WATERING, and not allowing the soil to drain properly, and dry out! So just don't do it.