What is plant propagation?
Plant propagation broadly refers to creating new plants via any method. There are two kinds of reproduction:
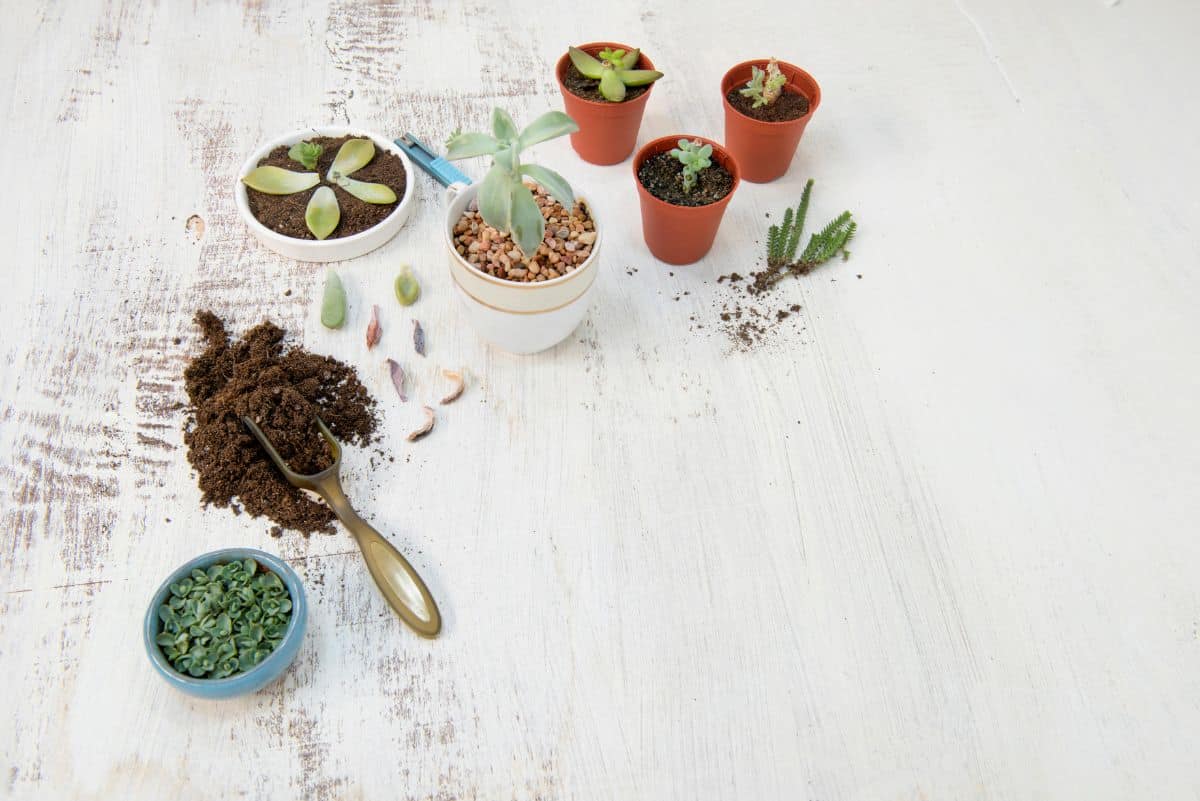
Sexual Reproduction: When you say reproduction, you're usually thinking of this type. If you dispense with the human connotation, sexual reproduction simply means that genetic information from two individuals is mixed to produce a new organism. For most plants, this means the classic pollination method.
Asexual Reproduction: Any sort of reproduction where genetic information isn't mixed up. Asexual reproduction usually produces offspring that are genetically identical to the parent - and these are called clones. This is rare in animals but pretty normal for plants - notably succulents, which are quite good at it.
In common usage, and especially in the context of succulents, the term 'propagation' most often refers to asexual reproduction.
Jump to:
- What is plant propagation?
- Why propagate succulents?
- How to Propagate Succulents
- Propagating Succulents via Leaf
- Propagating Succulents via Cuttings (or Beheading!)
- Propagating Succulents via Buds
- How to Propagate Cacti
- Cactus Cutting Propagation
- Cactus Budding Propagation
- Propagation Tips and Tricks
- On Rooting Hormones
Why propagate succulents?
There's the obvious answer: to get more plants!
Propagating succulents (asexually) is a remarkably easy process. It's also relatively fast and cheap compared to growing from seed - which requires pollination (intentional or otherwise), seed harvesting (which is kinda laborious for some plants), and then the actual germination of seeds (which is occasionally complex and quite slow).
However, the most important reason any plant is propagated is because it is a clone. It's a guaranteed replica of the parent. Like animals, when a plant sexually reproduces the offspring is a mix of both parents - and it's unpredictable what traits it will inherit.
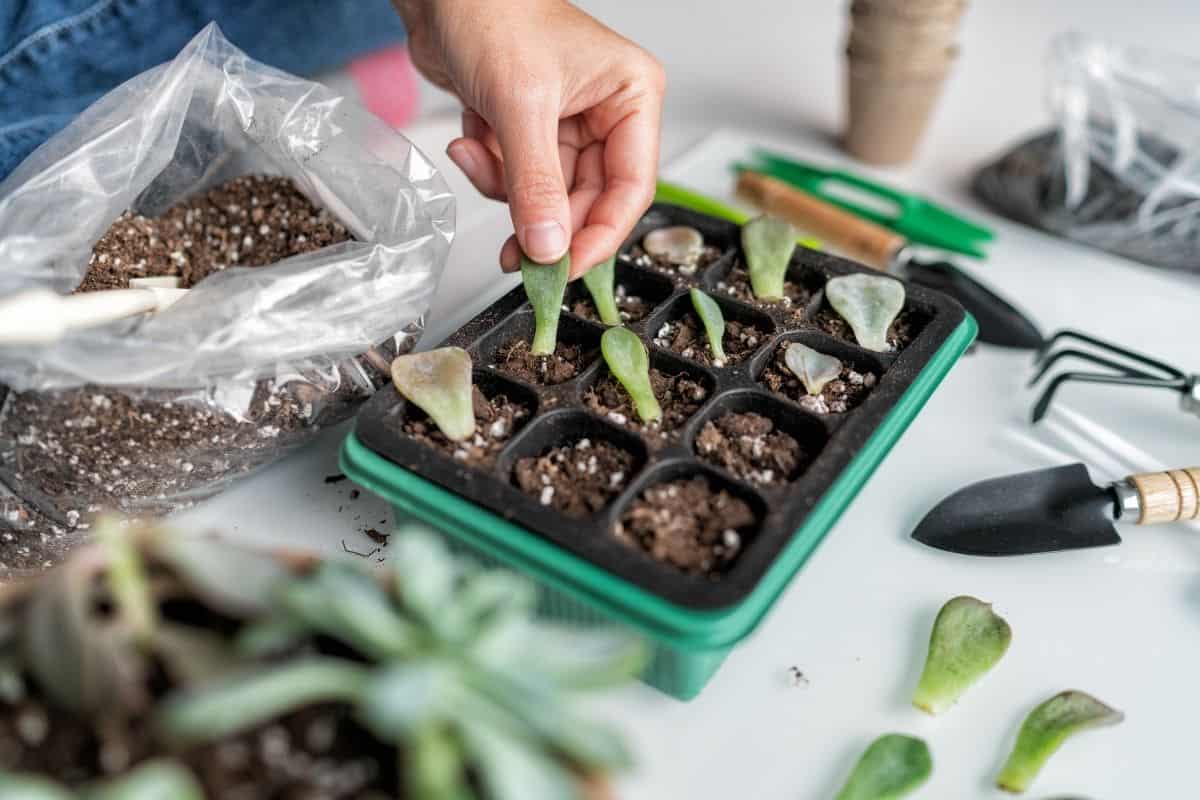
We put a LOT of effort into cultivating plants to be exactly how we want them. Breeding is a very time, labor, and money-intensive process. All that investment is wasted if it breeds with another, regular plant. The offspring will be quite different from the parent.
As an example, take pretty much any commercially grown crop. Every Red Delicious apple is a clone of the first Red Delicious apple. If you plant seeds from a Red Delicious apple, the fruit that tree eventually produces won't be identical (because seeds are the result of pollination, which is sexual reproduction). Even if the plant self-pollinates, which some do, the DNA is still mixed up so it's not a clone.
The way we ramp up production of Red Delicious apples is by asexually propagating via grafts - a branch from that original Red Delicious tree was painstakingly cut off and grafted to another apple tree. The branch still has Red Delicious DNA, and thus produces Red Deliciouses. This process is repeated ad nauseam.
This is how specific cultivars of plants are created too, though you can use any asexual propagation method for clones, not just grafting. That's also how plants can be patented... but any seeds they produce will have different DNA and aren't protected by the patent.
How to Propagate Succulents
Succulents can be propagated in a few different ways. Deciding which propagation method to use on which plant mostly requires previous knowledge, but with some experience, you'll be able to predict pretty accurately which method to use on a particular plant.
Here's a tip: most plants in a genus will reproduce the same way. For example, no Haworthia will readily propagate from a leaf, but practically all of them will form pups at some point.
Remember that nature is messy, so not everything fits into a neat category and follows all the rules. Inevitably, you will encounter some anecdote such as "I pulled a leaf off of my Haworthia and put it in water and it grew a new plant overnight!"
Ignore that advice. Sure, there's a 0.1% chance an Haworthia leaf might propagate, but it's a waste of time and leaves to try it.
Propagating Succulents via Leaf
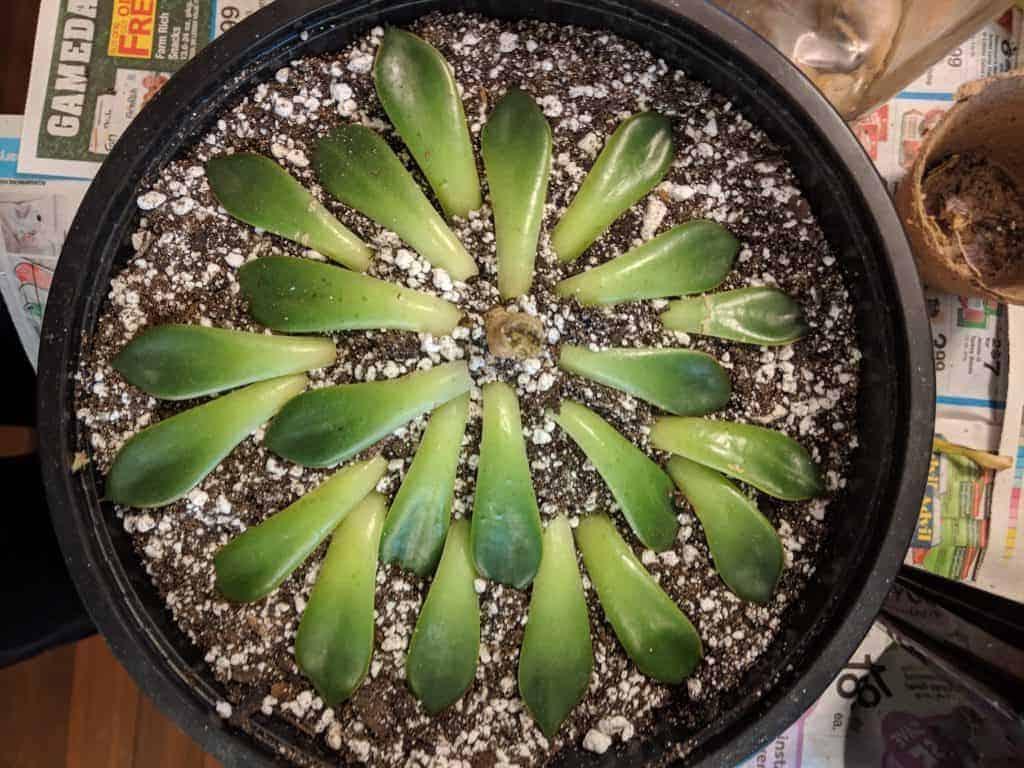
This is the most common method of succulent propagation. It's also the simplest. Here are the steps to propagating succulents via leaf:
- Remove leaf.
Aaaand you're done!
For real, it's actually that easy. It only works with some succulents, however. It should probably have leaves, for starters. If it has a stem, it might also be a good candidate (so, not Aloe or Haworthia). Some common genera that work well with leaf propagation are:
- Echeveria
- Graptopetalum
- Graptosedum
- Pachyveria
Note that even if you do everything correctly, it's entirely possible that the leaf simply won't propagate a new plant. I'd estimate that 90% of the leaves will grow roots, but only about 50%-60% of them ever form a baby plant.
Removing the Leaf
Removing the leaf properly is actually the most important part of the process. Getting a clean break is the largest factor that determines whether or not the leaf will germinate into a new plant.
So, how do you get a clean break on a succulent leaf? Some succulents will take care of that for you; a lot of common succulents have leaves that fall off at the slightest touch. If they don't, use this technique: Grasp the leaf firmly between the forefinger and thumb as close to the base as possible. Work it side-to-side gently until it separates.
If all goes well there won't be any tissue from the leaf remaining on the stem (or vice versa). The end of the leaf will have a very slight concave shape from where it was attached to the round stem.
Allow the Leaf to Callus
Now you simply wait.
The spot where the leaf was removed from the stem is an "open wound" for both the leaf and the mother plant. Just like animals, that leaves them susceptible to diseases - bacteria, viruses, fungi - getting in and causing them harm. So, also like animals, they form a protective scab to prevent anything from getting in or out.
In plants, that scab is called a callus. It'll happen without you doing anything, but you need to keep the leaf dry for it to form quickly and correctly. It should take between 3 and 10 days for the callus to form completely, so keep it away from humidity and moisture during that time.
I usually put the leaves in a dish or tray in indirect light so that they don't get sunburned or watered by accident.
Wait for Roots to Appear
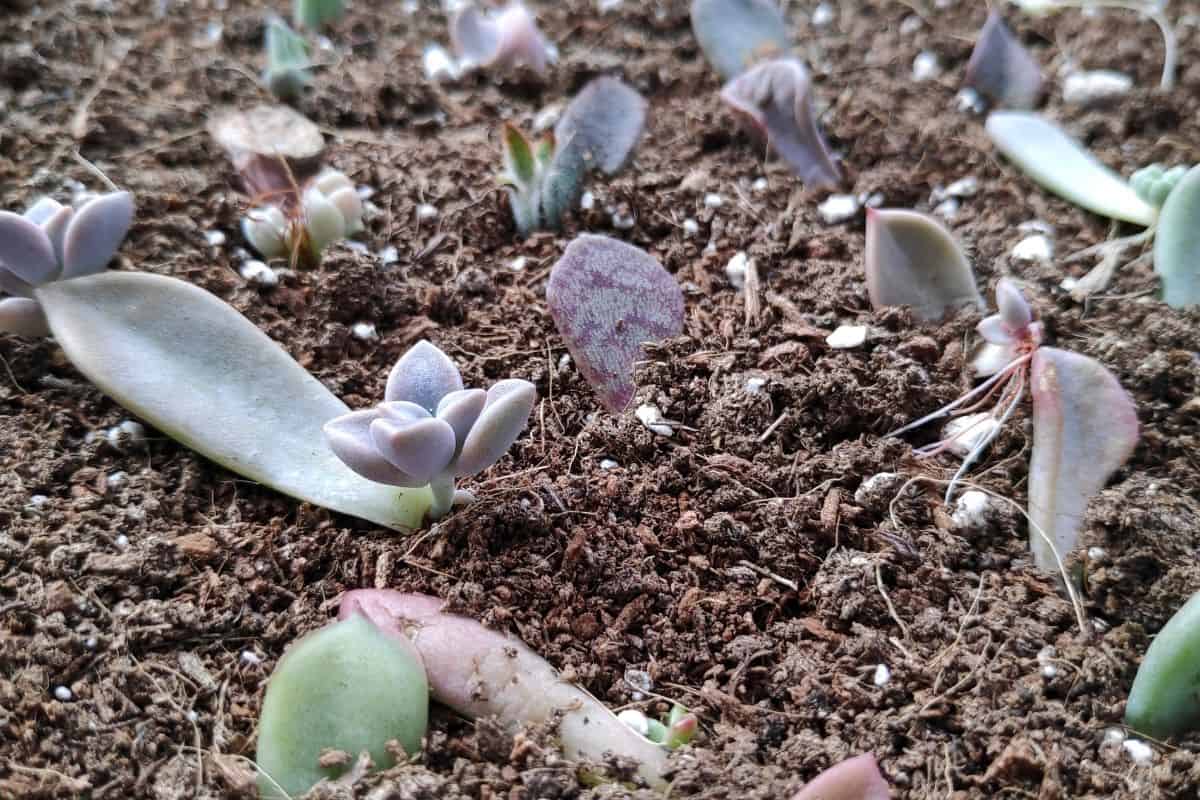
If all goes well, roots should start to grow from the callus a few weeks to a few months after it's plucked. The time it takes is highly variable - it depends on the condition of the leaf at the time of pulling, ambient conditions, the species, and possibly the presence of dirt.
Once your leaves are callused, you might want to put them on some dirt. Once they have roots, they'll want the opportunity to dig them in. Note that you should not bury propagating leaves or their roots. The plant will take care of it when it's ready.
The depth of the dirt doesn't really matter. The roots won't grow that deep before it's transplanted anyway.
Once the roots are fully present (not just tiny pink nubs sticking out of the leaf), you should endeavor to keep it moist. This is the only time I endorse misting succulents (otherwise it's a bad watering habit). It is possible for the roots to dry out and shrivel up, but it's easily avoided by spritzing them every few days.
Once the Plantlet Grows
Exciting! A baby plant you made all by yourself - congratulations!
You'll notice that the mother leaf will begin to deflate after the baby succulent appears. All of the nutrients and water are being diverted to the new plant. The mother leaf will wilt, yellow, and eventually shrivel up entirely. Only then, when it is brown and desiccated, should you remove it.
No products found.
And, until then, you only need to do supplementary watering. The misting we used in the prior step is okay, and so is using a dropper to put water directly on the roots.
In the early days, it'll be vulnerable to sunburn but also liable to grow etiolated. It's a thin line to walk, so monitor your plant until you're sure it's fine. Using red and blue LED grow lights can help get the necessary light without the burning.
Your plantlet doesn't graduate to adolescence until it's about an inch in diameter. Then it's safe to transplant it to its own pot or an arrangement or whatever. That can take quite a while though, a year or more!
Propagating Succulents via Cuttings (or Beheading!)
Although it sounds gruesome, it's a pretty standard propagation technique for all kinds of plants. It's normally just called 'taking a cutting', but when referring to rosette-shaped succulents the practice is sometimes called beheading.
Like leaf propagation, it's only a viable method on plants with a pronounced stem (sorry Aloe). After all, you're literally just snipping the stem. Here are a few genera that respond well to beheading:
- Echeveria
- Sedum
- Graptopetalum
- Graptosedum
- Crassula
Are you seeing some overlap between the plants that do well with leaf propagation and beheading propagation? You should be - these two methods often go hand in hand.
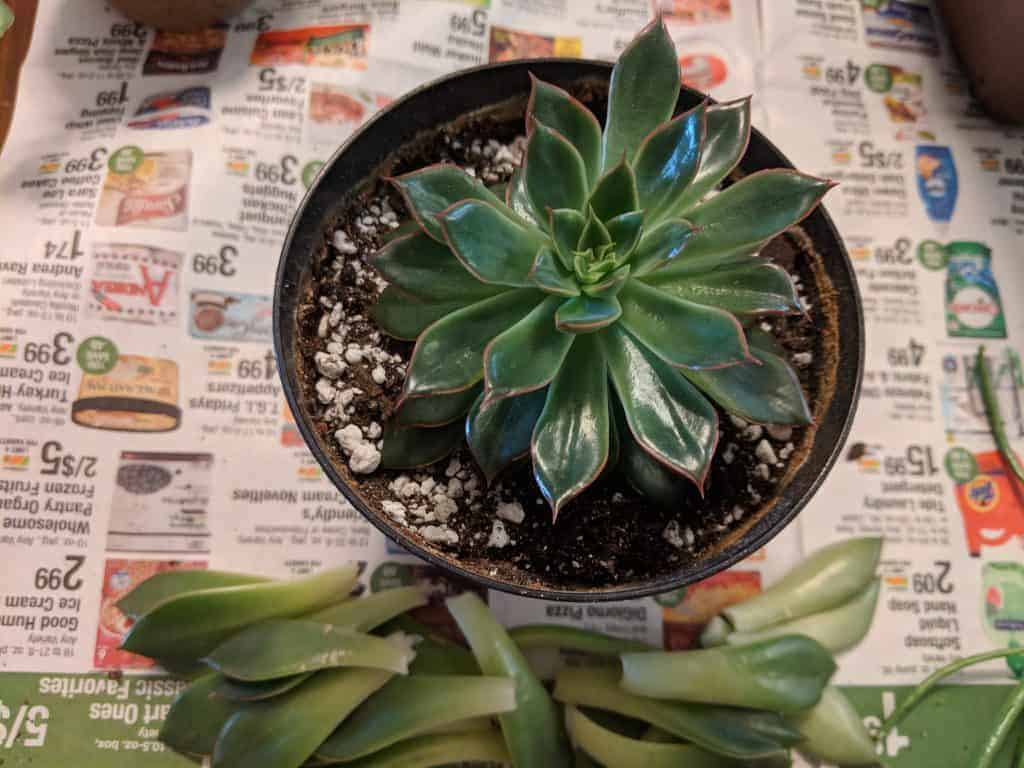
The greatest use for this type of propagation is correcting etiolated succulents. When a plant grows with too little light it becomes elongated and leggy; it's not very attractive. Etiolation is not reversible either - once a plant grows that way it will always look that way. Even if it's given full light and resumes normal growth.
With a non-succulent, you have to prune that part of the plant and be sad. With succulents, you can just chop that part off and plant it again! Now you have two plants and no ugliness. Ensure you have full light this time to avoid etiolation.
Done properly, this method has a greater than 90% success rate. It's reliable and the plants are pleasing to look at the whole time.
Alright, time to talk cutting. Here's how to benignly behead succulents:
Deciding Where to Cut
You want to cut off the terminal end of a branch (the outward end, furthest from the main stem). Or, if there's only one stem/branch, you'd want to cut near the top. That's pretty intuitive anyway, that's where the new growth comes from.
How much to cut off? It's up to you, really. The cut should be at least 3 inches from the end of the branch, but it could be much longer if you want. It won't change how fast it grows new roots.
Ideally, that section should be very healthy. Robust, full leaves. Evidence of new growth. Not too much scarring or damage to the leaves or stem. The healthier the cutting is, the more likely it is to survive and the faster it will resume growth.
Note that you'll rarely want to try and propagate a "middle section". As in, don't bother trying to cut another length out of the same stem. It's possible that the cutting will propagate, but that's infrequent enough that it's not worth wasting plant over.
Preparing the Stem
The goal here is to achieve unrestricted access to the stem you want to cut. You may have to unpot the plant to get at the right spot, and that's totally fine. They don't really mind being repotted (here's a guide to repotting if you need one).
More likely, however, is that you'll need to remove leaves to get a clear shot at the stem. Chances are that those leaves can be propagated! Using the technique described above, remove those leaves carefully and set them aside to be propagated.
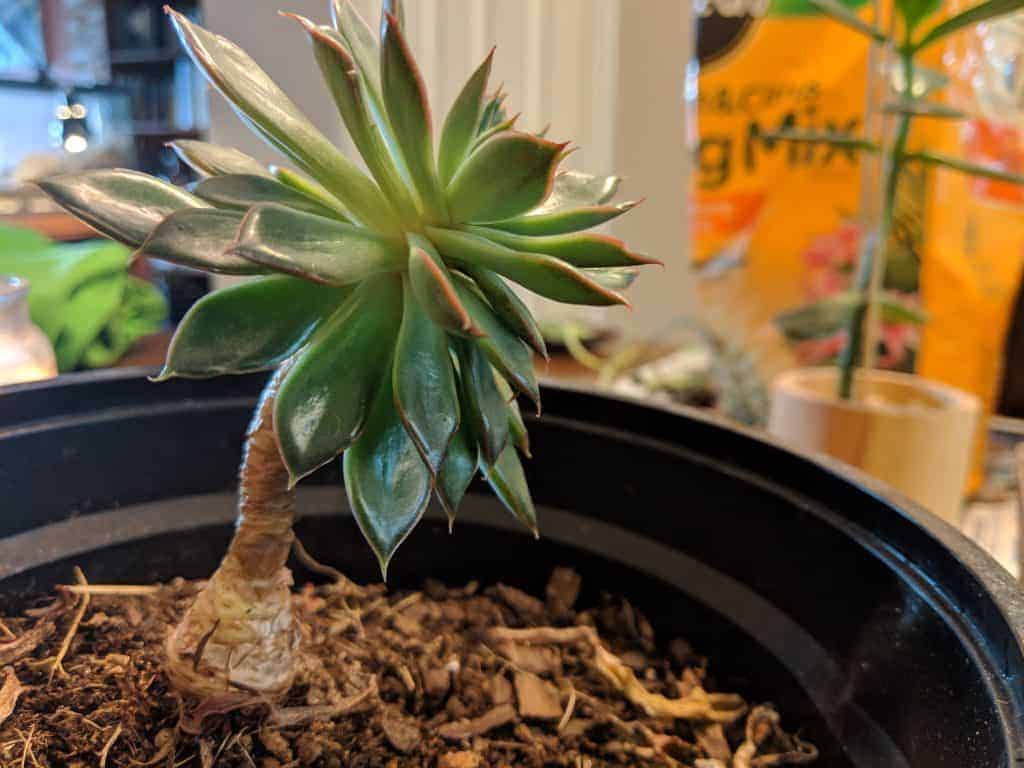
Strip the leaves so that you have between one and two inches of bare stem, you want to cut it so that you are keeping as much bare stem on the cutting as possible. The mother plant should have leaves right up to the incision, but the cutting should have a nice bare bottom.
Making the Cut
Now that you've decided where to cut and cleared the zone, it's time to go ahead and pull out the guillotine. We're going medieval up in here.
Now, you could cut the plant with some regular scissors but that's not optimal. If you're anything like me, you've never sharpened those scissors once in your whole life. They're probably pretty dull and mostly get through things with blunt force.
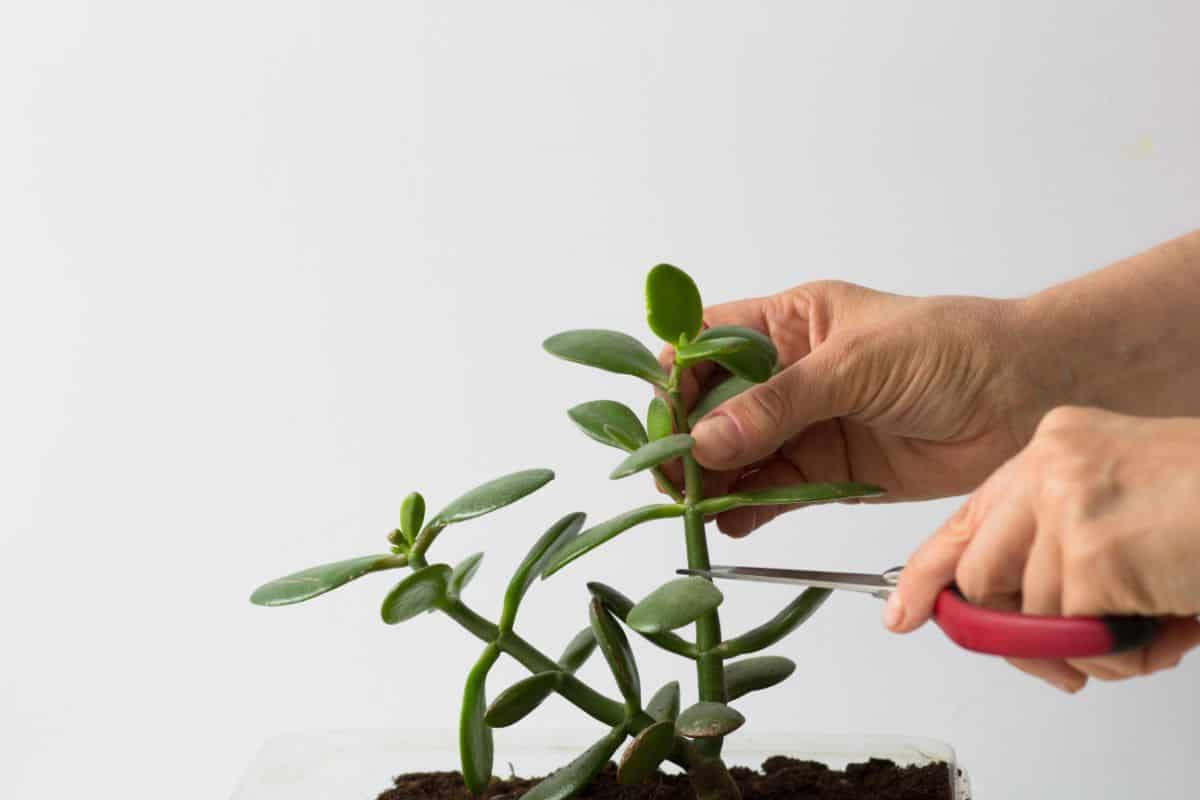
The most important factor for success in taking a cutting is making a clean, precise cut. Use the sharpest scissors you have (honestly, a pair of gardening scissors or shears is pretty helpful here). Make the cut perfectly perpendicular to the stem - none of that diagonal nonsense like you're putting flowers in water.
Dull scissors tend to crush the plant as much as they cut it, and that makes it much less likely to successfully heal and root again. Jagged cuts are also no good. If you cut poorly, you can just try again a little higher up on the stem.
Also, be certain that your scissors are sterile beforehand. The last thing you want is to introduce bacteria or fungus into a fresh-cut wound. If you're beheading multiple plants, keep a bottle of isopropyl alcohol on hand to dip your scissors in between uses. Congrats, you're basically a barber now.
Prepping the Cutting
If all has gone well, you should have a little cutting with an inch or two of bare stem and a helping of lively leaves.
As with leaves, you want to let the cutting callus before doing anything with it. Set it aside on a clean surface with some indirect light and wait a week. No soil necessary here. Once it is good and callused, just stick the bare end down into the dirt up to the bottom leaf. You're all done!
Strictly speaking, you could just put the cutting directly into the soil without waiting for a callus. In doing so, you expose it to potential pathogens which could get in the fresh cut and infect it. Worse still, moisture in the soil could mess up the callus formation.
I'll be honest, I put them straight in the soil if I'm in a rush. I don't think it's a significant danger, but if you want to cover all your bases you should let them callus fully before planting.
Caring for the Cutting
Keep it in the same conditions as the mother plant for the most part. If you're rehabilitating an etiolated plant, make sure it gets more light. I find LED grow lights to be useful for cuttings - plenty of light for vegetative growth, but not so intense that it will burn the fragile cutting.
Here's the bit that always gets people - you don't need to water your cuttings. They don't have roots - how would they take in the water anyway? Watering is just an unnecessary risk at this point (the danger being perpetually damp soil inviting pests and disease).
There is no need to water until they have roots. It's pretty tough to tell when roots form since, ya know, they are generally underground. You could leave it out of the dirt until roots start showing, but that will make a long process take much longer. The roots appear faster in the presence of dirt.
Your best bet is to wait until it starts wrinkling. There is enough water stored in the leaves and stem to tide the plant over for months probably. It won't start wilting until it has depleted those stores, which should be well after roots appearing.
Once you begin watering, water it as you would any other succulent - drench it. Succulents propagated this way are pretty much adult plants from the get-go.
As a final note - don't throw away the bottom, rooted half of the cutting! If you were planning on tossing it because it was etiolated or something, don't. Just trim it down. Even if it has no leaves, there's a pretty good chance it'll grow some in the next couple months. Try it!
Propagating Succulents via Buds
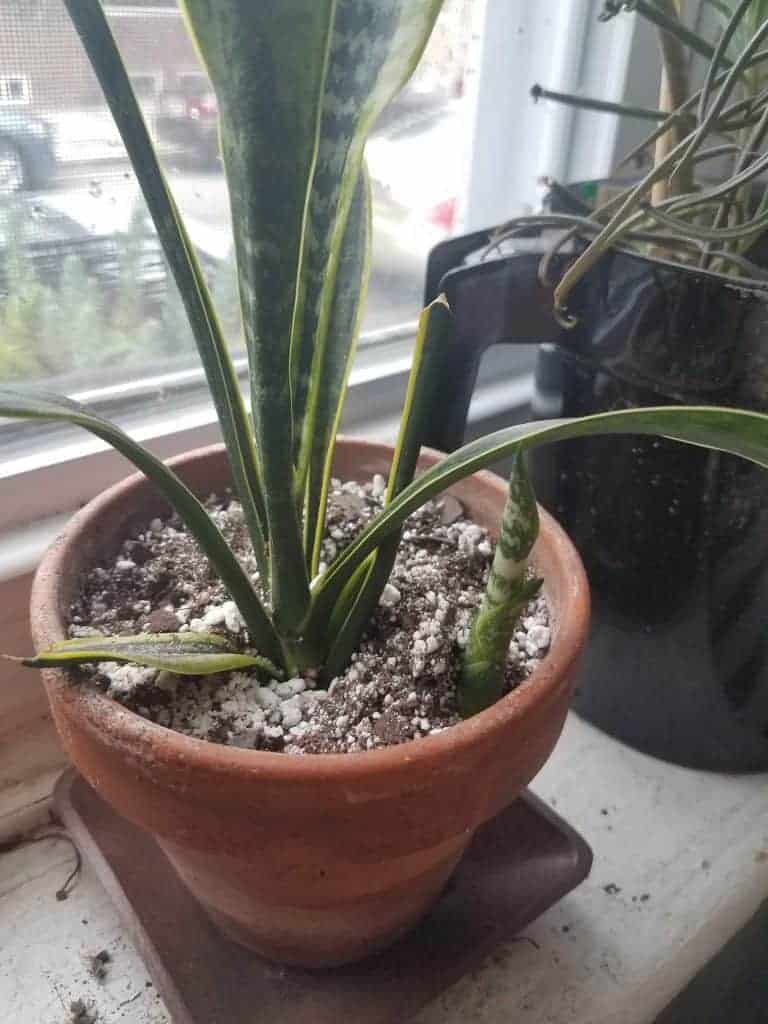
It's almost unfair to present this as a propagation technique when, in reality, the plants are doing all of the work. The baby plants are called by many names: pups, buds, runners, plantlets, offshoots, etc.
Budding is asexual reproduction at its finest. None of that fancy leaves-and-stems-growing-roots stuff. Just a regular old clone attached to the momma at the stem or roots.
There are many succulents and cacti that naturally propagate through this method. None is more famous than Sempervivum, called Hens and Chicks because of their proclivity to propagation. Here are a few other genera that do the same thing:
- Aloe
- Haworthia
- Sansevieria
- Gasteria
Budding is hardly unique to the succulent clade. It's the most common form of asexual reproduction in the plant kingdom. Crabgrass does it on the daily in its quest to take over your lawn. It's a lot cuter when your Aloe does it, though.
This method has the advantage of starting you off with a fully formed plant - stem, roots, leaves - they're all there. Despite that, in my personal experience, it's still not a guaranteed successful propagation. I've been averaging about an 85% success rate, give or take.
When to Separate a Bud
This is the most difficult part of the process. Not because it's hard to determine the correct time, but because succulents look super cute with lots of baby succulents hanging around them.
However, if you want to expand your collection for selling, trading, or gifting, you'll need to emotionally prepare yourself to kidnap the baby plants.
A bud becomes eligible for the snip when it crosses the threshold from baby to juvenile. For most succulents, this is about when they hit one inch in diameter.
Another consideration is whether or not they have their own root system. Early in development, they may simply share the parents before they grow their own. Root organization is highly dependent on the species, though, plus you'd have to dig it up to check.
From the mother plant's point of view, it's a good idea to cull some babies once she gets crowded. That will free up both space and energy to focus on personal growth... or making more plantlets!
Separating a Bud from the Mother Plant
This process is almost identical to taking a cutting, so I won't dwell on it too long.
Since buds and pups and offshoots come in many forms, you'll have to adapt to whatever situation you have. The basic steps for all of them are the same:
- Get some really clean, really sharp scissors.
- Find the spot where the bud's stem meets the mother's stem. You may have to unpot the plant and that's okay.
- Make a clean snip. Try to preserve all the leaves and roots. If it shares roots with the parent, err on the side of giving more to the baby.
Since it's a full-fledged plant already, we will launch right into care.
Caring for a Bud
Unlike with cuttings, we skip the callusing phase. It's true that there is an open wound on the plant - and yes, it does need to callus. But this time around we have roots to take care of and they take precedence.
Roots are fragile little things, liable to drying out without warning. Root hairs, which you generally can't see, actually perform most of the root's functions and they could wither up in mere hours in a dry environment.
That's not a huge deal for succulents since they can survive long enough to grow new root hairs, but it's best to make the transplanting process as painless as possible. Therefore, we should pot the new plantlet immediately after removing it - no need to wait for callusing.
Still, you don't want to get that open wound wet. Delay watering for at least a week. Then, treat the bud as you do any other small succulent: lots of light, letting it dry out between waterings, and taking lots of pictures to put on your Instagram.
How to Propagate Cacti
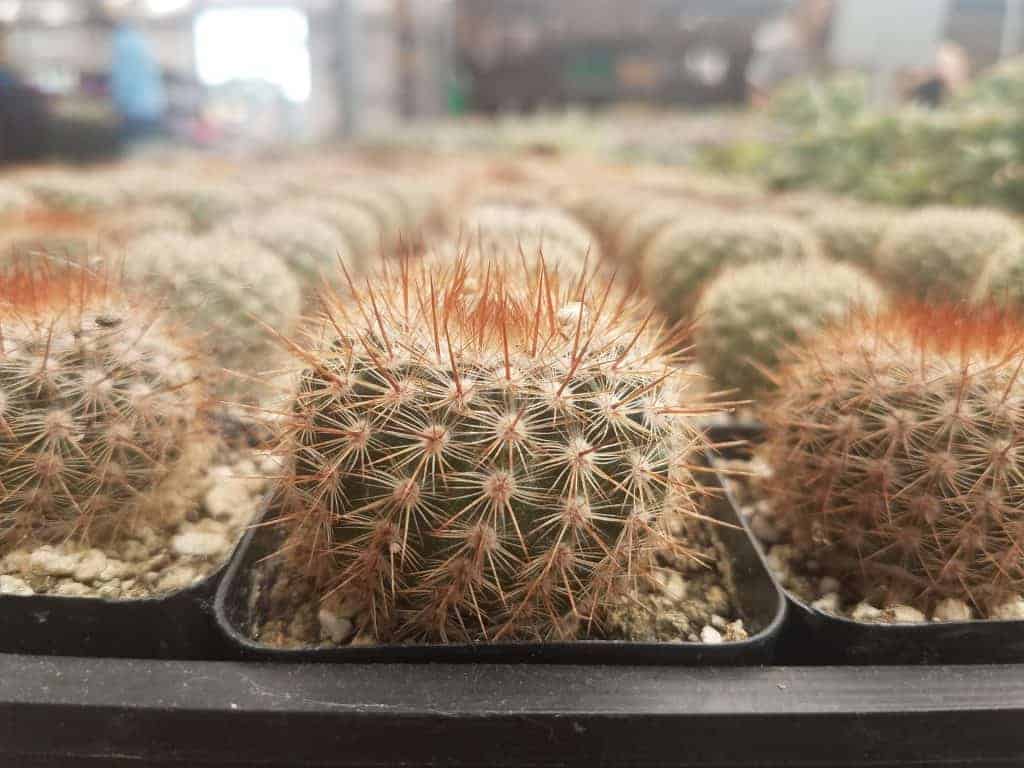
Propagating cacti is pretty easy, actually. You just use modified versions of the techniques described above.
Some confusion might be introduced when talking about cactus anatomy as compared to succulent anatomy. For most cacti, it's pretty obvious that they're all stem and no leaf. Look at an Opuntia, though, and you could be convinced that those pads are, in fact, leaves...
But, no, they are not. In fact, the characteristic spines of a cactus are technically their leaves. Highly, very highly, modified leaves. Spines or spikes on a succulent, while sometimes similar, are usually a kind of trichome. Trichomes are a general purpose hairlike structure often adapted for defensive measures.
Any time you think you see a cactus with leaves, it's probably a Euphorbia, the wannabe-cactus succulents.
Anyway, leaf propagation is definitely out for cacti, but cutting and pupping are totally valid!
Here's a fun fact: Pretty much every cactus can be put into one of three categories.
- Spherical (or globular, like a barrel cactus)
- Cylindrical (or columnar, like a saguaro cactus)
- Pad...-ical (that's not a word, but it means stuff like the prickly pear)
There are also epiphytic cacti (they grow on other plants), but for most purposes, they can be treated like they have pads.
The shape of the cactus determines how it should be propagated.
Cactus Cutting Propagation
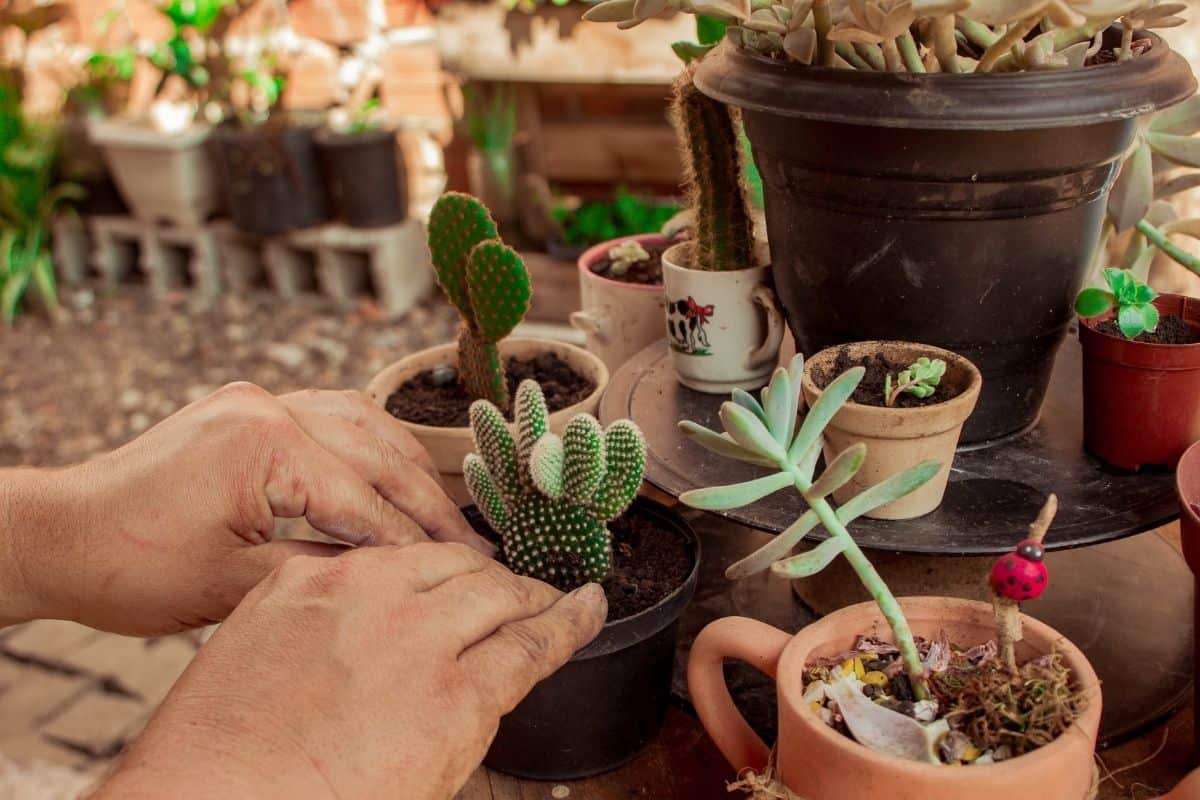
This works with any cactus that is not spherical.
Propagating Pad Cacti
For cacti like your standard prickly pear Opuntia, it couldn't be easier. Using those same cutting best practices we described above, you separate the pads.
On most cacti, there will be a distinct dividing line between the pads so figuring out the place to make the cut should be intuitive. If you're having trouble distinguishing, remember that you want to get exactly 100% of that pad - cut a little extra if you're having doubts.
In fact, for many padded cacti, the connection between pads should be weak enough that you can break it by wiggling it back and forth a little (just like we did with those leaves).
Warning: Any time you are handling cacti, you absolutely must wear thornproof hand protection. Not only are the spines dangerous but the near-invisible glochids can really mess you up.
Treat the pad like you would any succulent cutting. Lay it on some dirt and wait for it to callus. Once the roots grow, pot it as you would any other cactus and begin a standard watering regime.
Propagating Cylindrical Cacti
There are a lot of miscellaneous kinds of cacti that fall into this category, so adapt the procedures as necessary. Also, note that this method of propagation is not terribly, overly effective. Cutting a cylindrical cactus is pretty traumatic for the plant and does not always result in a successful propagation.
The process isn't very technical and there aren't nice, built-in guidelines on the plant like with succulents. All you do is get a nice, healthy cactus section and... lop it off.
Yup, just like that. It doesn't really matter where. Do the same clean cutting with a sharp blade that we've been talking about. Your cactus is probably too big for scissors to manage so use a sharp (non-serrated) knife. Only handle a cactus while wearing gloves, naturally.
The bottom half that's still in the ground will be totally fine. That top bit will callus over and eventually start to grow again around the edges of the scar (probably a few new growths, actually).
The part you cut off will take a while to callus over fully. Then you can place it on top of dirt, or bury it a couple inches into the ground, and wait. And wait, and wait, and wait. That cutting, if it decides to root, could take up to 6 months to get going. Or it might just wither up and never produce roots.
Either way, no point in watering until you see roots!
Cactus Budding Propagation
While it is the primary form of asexual reproduction for most spherical cacti, other kinds of cacti engage in budding as well. You’ll see the cylindrical type with buds too sometimes.
That being the case, the line between cutting and budding propagation can get blurry. Don’t worry too much about it because you will treat them mostly the same anyway.
For the description of the process, we’ll use our typical barrel cactus. They, as with most rotund cacti, grow little buds right off the main sphere. Most of the time it’s around the base of the cactus, but you’ll occasionally just find them hanging out elsewhere on the plant.
They start off as tiny little balls, you might not even notice them at first. It’s also pretty easy to confuse them with potential flowers – you have to wait until it’s a bit bigger to see which it is. Eventually, they’ll grow large enough (an inch or two in diameter) to be removed and replanted.
Use the same old cutting process we’ve described a million times to separate it cleanly from the mother plant. Allow it to callus. Plop it on some dirt. You know the drill by now; you could probably start teaching other people if you want.
That’s really all there is to it. More than likely there won’t be any roots, so you shouldn’t water it until they show up. Cacti thrive in bright light, so be sure not to disappoint.
Propagation Tips and Tricks
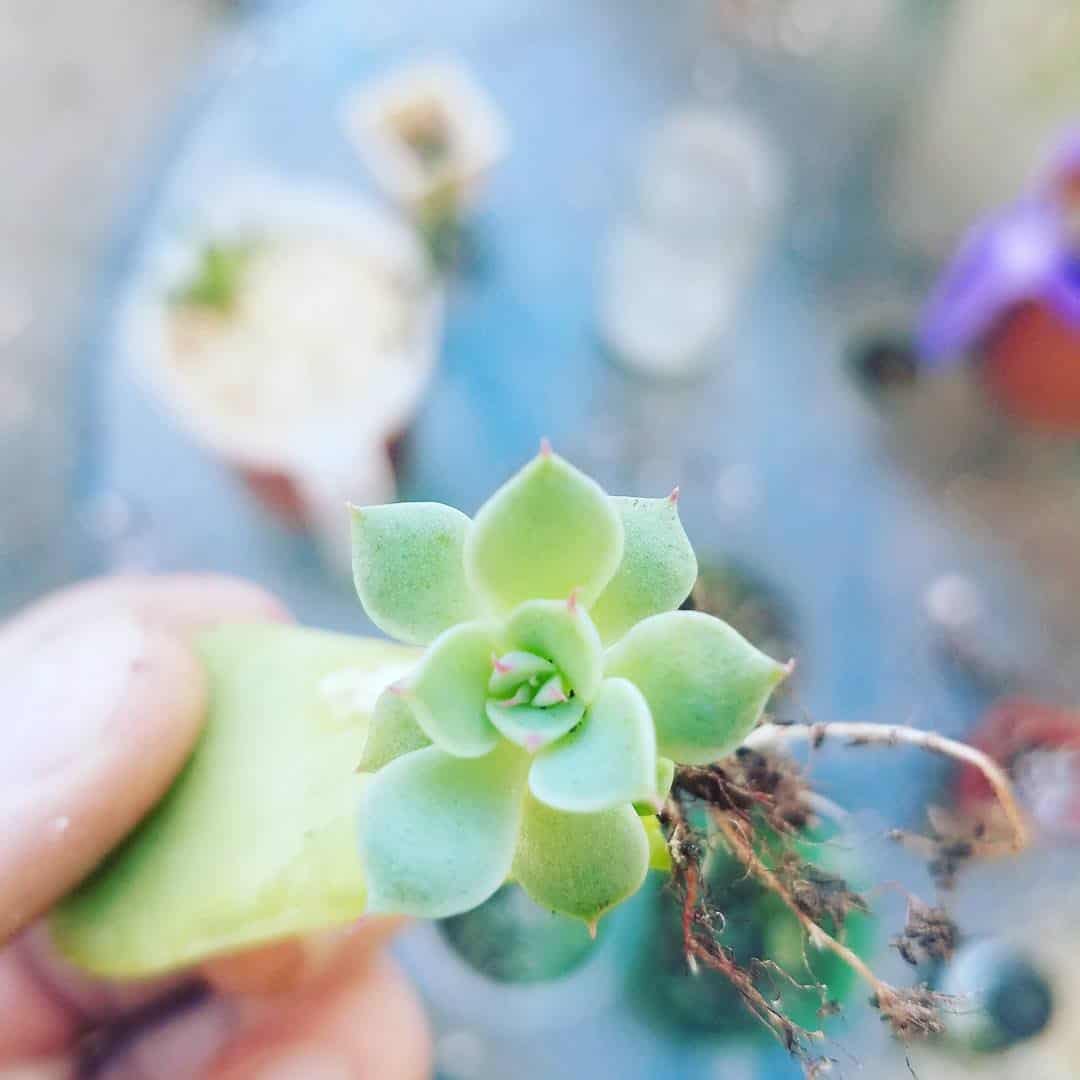
Here are some miscellaneous pieces of advice regarding propagation:
- With budding, choosing when to propagate is easy. Once the bud is big enough you can remove and propagate it whenever you’d like. Leaving a bud attached to the mother won’t hinder her in any way – crowding isn’t an issue if they’re all offspring.
- Propagating should only be done with strong healthy plants, however. Attempting to propagate an ailing succulent will probably result in failure or an extremely long recovery process. You can, however, behead a plant suffering from root rot to propagate it if you’re careful to cut well above the rotted stem.
- Seasons are unimportant to propagation. Assuming you are doing your propagation indoors, of course. People usually try to avoid propagating during a plant’s dormancy, which is a good thought. The reality is that if plants are kept indoors in stable conditions the effects of dormancy are negated or nullified entirely.
- Try to water your plant a few days before you plan to propagate it. That timing ensures that the props will be fully hydrated and plump, increasing the chance of successful propagation.
On Rooting Hormones
The use of rooting hormones (or rooting powder) is a contentious topic amongst succulent enthusiasts. Some swear by it; others think it’s superfluous or even blasphemous.
Rooting hormone certainly isn’t necessary – few other plants have the natural propagation power that succulents and cacti have. Most rooting hormone is used on those inferior plants that don’t have the intrinsic ability to grow roots out of anywhere.
Out of curiosity, I ran a controlled experiment on the effects of rooting hormone and several home-remedy versions of it (honey and cinnamon). The props with the powder absolutely grew lots of roots but ended up not forming plantlets as quickly or as robustly.
My opinion: Rooting hormone is unnecessary for the vast majority of succulents.
I love to be proved wrong, though, so let me know how it goes if you try it. Make sure you apply it before the callus forms or else it won’t have any effect.
Is there anything about propagation that I missed or you need clarification on? Let me know in the comments below!


Cindy Groves
This was VERY useful information! Thank you for passing this along to your readers!
Patrick Grubbs
I'm so glad you found it helpful 🙂
Anne
thank you for this, especially about the part about the rooting hormone. i have it and it's been a bit helpful so far.
have you tried water propagation? i would love to read an article if you happen to try it.
ziba
Hi Patrick,
Thank you for all the useful information you shared. I'm still not sure how to propagate the Echiveria blade runner. Could you say a little more. The chicks seem attached to the mother. also, they don't seem to propagate on their own as much. Any idea? Thank you.
Alecia Spiering
Thank you some great information for sure. Someone mentioned water propagation. I had been propagating leaves on top of the soil but it was slow and quite a few leaves died in the process. I watched a video on how to propagate in water and it was amazing. The plants grew much faster and about a 95% success rate. Very few leaves died.
The method is taking a bowl of (I used a clear bowl because there is much more light coming through), adding about 1 inch on water, than cover the bowl tightly with saran type wrap. Carefully place the leaves down in the plastic, by first using a sharp knife point, slit the plastic. The slit should only be large enough to place a small part of the leaf into. You can fit lots of leaves in one bowl. I have about 40 in a bowl right now. I know it will be hard to picture so search youtube and find a video there.
The best part is the speed for the plantlet to begins growing on the end of the leaflet. It takes 3-4 weeks to get a new plantlet. I keep them inside the bowl until they get lots of roots, before planting in soil. It works!